ZigZag Waffle Stitch Crochet Free Pattern
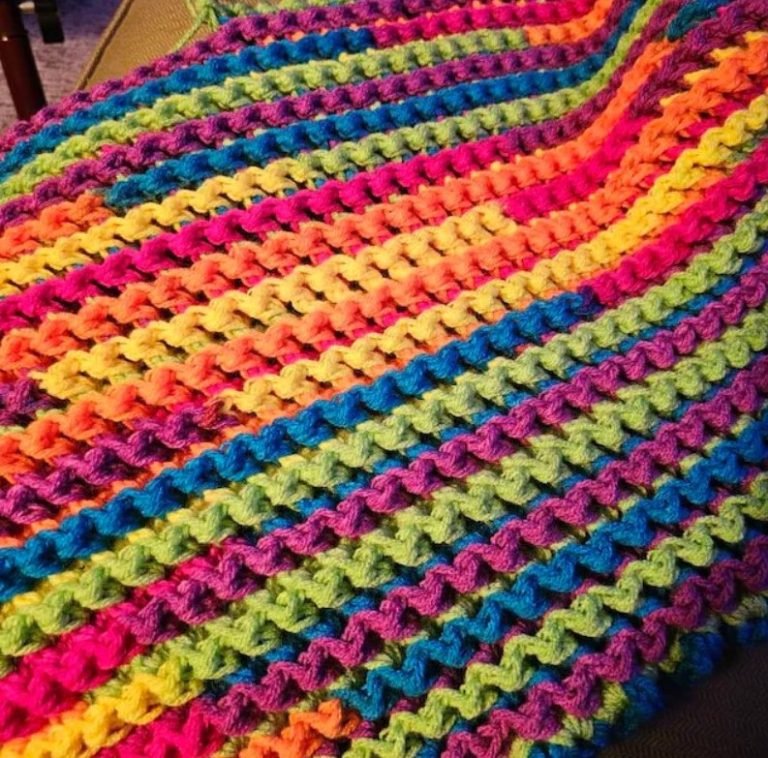
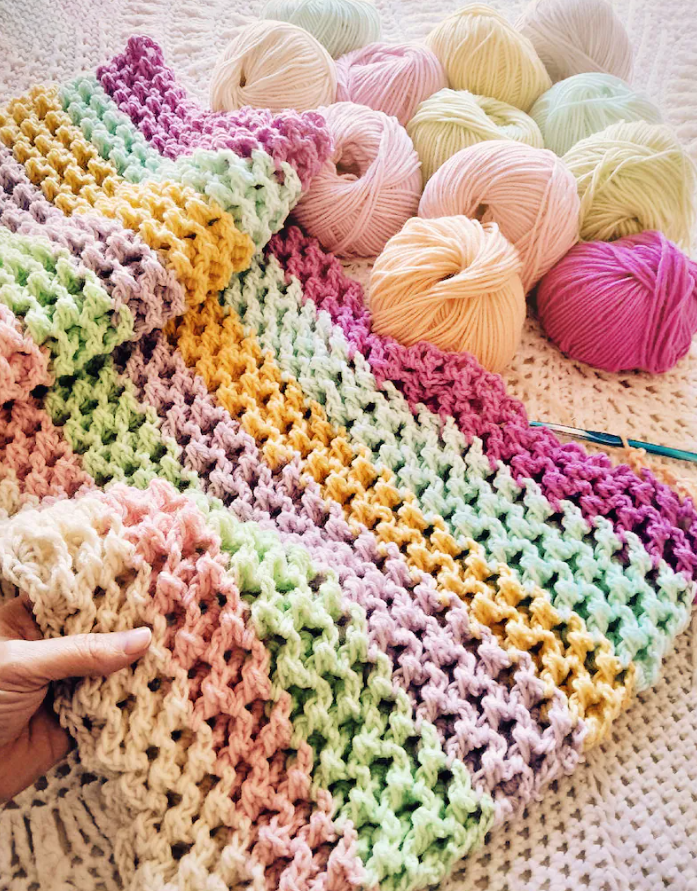
Are you looking for a fun and textured crochet stitch to add to your collection? The ZigZag Waffle Stitch is perfect for projects that need a little extra dimension and visual interest. This unique stitch combines the beauty of the waffle pattern with a zigzag effect, creating a stunning texture. Below, you’ll find the full pattern and instructions to crochet this beautiful stitch.
Looking to elevate your next crochet project with a stitch that combines both texture and visual interest? The ZigZag Waffle Stitch is the perfect choice! This dynamic stitch pattern creates a beautifully textured fabric with a raised, grid-like design, while the zigzag effect adds a unique twist to the classic waffle stitch.
Ideal for blankets, scarves, and other cozy projects, this stitch is versatile and eye-catching. Whether you’re an intermediate crocheter or looking to challenge yourself, the ZigZag Waffle Stitch will add a fresh and modern look to your crochet creations.

Pattern Information
- Skill Level: Intermediate
- Abbreviations:
- Ch – Chain
- DC – Double Crochet
- FPDC – Front Post Double Crochet
- RPT – Repeat
- SP – Space
- ST – Stitch
Materials Needed:
- Your choice of yarn (worsted weight works well for this pattern).
- Appropriate hook size for your chosen yarn.
- Scissors and a tapestry needle for weaving in ends.
Pattern Instructions
Foundation Chain:
Start by chaining 33 (multiple of 3).
Row 1: Double crochet (DC) in the 5th chain from the hook.
Double crochet (DC) in each stitch across the row.
Chain 3 and turn your work.
Row 2: Double crochet (DC) 3 times in the next stitch.
Repeat the following across the row: ∗∗Ch3∗∗,skip2stitches,∗∗3doublecrochets(3DC)∗∗inthenextstitch**Ch 3**, skip 2 stitches, **3 double crochets (3DC)** in the next stitch∗ ∗Ch3∗∗,skip2stitches,∗∗3doublecrochets(3DC)∗∗inthenextstitch.
At the end of the row, place a double crochet (DC) in the top of the turning chain from the previous row.
Chain 3 and turn your work.
Row 3: Repeat the following across the row: ∗∗3frontpostdoublecrochets(FPDC)∗∗inthethirdstitchofthepreviousrow’s3−DCgroup,∗∗Ch3∗∗**3 front post double crochets (FPDC)** in the third stitch of the previous row’s 3-DC group , **Ch 3**∗∗3frontpostdoublecrochets(FPDC)∗∗inthethirdstitchofthepreviousrow’s3−DCgroup,∗∗Ch3∗∗.
At the end of the row, place a double crochet (DC) in the top of the turning chain from the previous row.
Chain 3 and turn your work.
Repeat Row 3: Continue repeating Row 3, but substitute “previous row’s 3-FPDC” for “previous row’s 3-DC.”
Last Row: Repeat Row 3, but omit the chain 3s between the 3-FPDCs.
Fasten Off: Once you have reached your desired length, fasten off and weave in the ends.

Tips for Crocheting the ZigZag Waffle Stitch
- Make sure to maintain even tension throughout the project to enhance the texture of the waffle stitch.
- If you want to experiment with different yarns, try using a soft cotton blend for a cozy and breathable feel or a wool blend for extra warmth and structure.
- This stitch is great for blankets, scarves, or textured dishcloths—its versatility is endless!
Downloadable PDF
For your convenience, I’ve separated the pattern into a printable PDF format. Click [here] to download and keep it handy for your crochet projects.
ZigZag Waffle Stitch Pattern PDF HERE
Video Tutorial:
If you prefer learning visually, we’ve got you covered! We have a video tutorial that walks you through every step of the ZigZag Waffle Stitch pattern. Whether you’re a beginner or just like following along with videos, this tutorial will help you master the stitch with ease. Check it out and crochet along with us!
This ZigZag Waffle Stitch is a fantastic choice if you’re looking for a project that combines texture and structure in a fun and creative way. Whether you’re crocheting a cozy blanket or an eye-catching scarf, this stitch is sure to stand out. Let me know how your project turns out in the comments below, and feel free to share your finished creations!

I truly appreciate this post. I’ve been looking everywhere for this! Thank goodness I found it on Bing. You’ve made my day! Thx again