
Rainbow Waves Throw Crochet Pattern
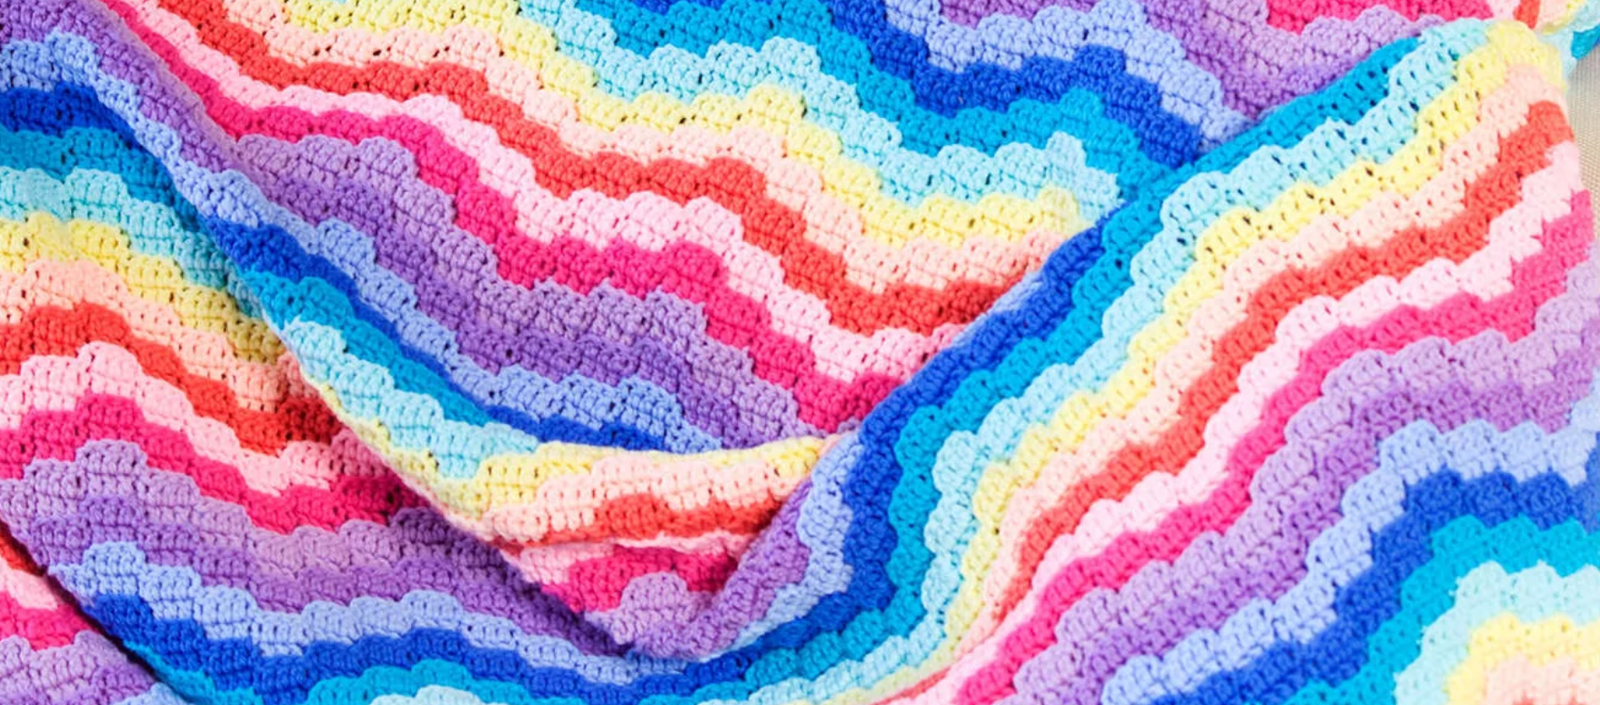
There’s nothing more cheerful than a rainbow, and this Rainbow Waves Throw brings that joy right into your home. The flowing wave design combined with bright, bold stripes of color creates a crochet project that is as fun to make as it is to use. Perfect as a cozy throw for your couch, a colorful blanket for a child’s room, or even a vibrant gift, this project is both beginner-friendly and eye-catching.
What makes this throw so unique is how it combines the relaxing rhythm of ripple stitches with the lively energy of rainbow color changes. Each row flows into the next, giving your blanket a sense of movement and brightness that makes crocheting it feel truly uplifting. It’s one of those patterns that will not only bring warmth but also happiness every time you pick it up.
The stitch pattern is easy to memorize once you get started, and the repeating rainbow color sequence makes it the perfect project for relaxing crochet sessions. Plus, you’ll love watching the colorful stripes grow with every row.
Materials Needed
-
Crochet Hook: 5 mm [US H-8]
-
Yarn Needle for weaving in ends
-
Yarn: Multiple colors of your choice to create the rainbow effect (at least 11 colors recommended)
Gauge
-
6 blocks = 7”
-
8 rows = 4¼” in pattern
📌 Tip: Always check your gauge before beginning. Adjust your hook size if necessary to ensure your finished throw measures correctly.
Abbreviations (US Terms)
-
ch = chain
-
dc = double crochet
-
mm = millimeters
-
st(s) = stitch(es)
-
yo = yarn over
-
* = repeat whatever follows the * as indicated
-
= work directions in brackets the number of times specified
Color Change Note
To change color at the end of the 2nd row of a color:
-
Work the last dc of the row in the top of the ch-3 until 2 loops remain on the hook.
-
Cut the current yarn, leaving a 4” strand.
-
With the next color, yarn over and pull through the 2 loops to finish the stitch.
-
Continue with the new color.
Pattern Stitch
Row 1 (Right Side)
Dc in 4th ch from hook, dc in next 2 ch, * skipnext2ch,slipstinnextch,ch3,dcinnext3chskip next 2 ch, slip st in next ch, ch 3, dc in next 3 ch 3 times, ch3,slipstinnextch,skipnext2ch,dcinnext3chch 3, slip st in next ch, skip next 2 ch, dc in next 3 ch 3 times; repeat from * to last ch; dc in last ch; turn.
📌 Note: Work all dc and slip sts into the back loop only of dc and ch on every row.
Row 2
Ch 3, skip first dc, * dcinnext3dc,skipslipst,skip2chofch−3,slipstinnextch,ch3dc in next 3 dc, skip slip st, skip 2 ch of ch-3, slip st in next ch, ch 3 3 times, dcinnext3dc,ch3,slipstinnextch,skipnext2ch,skipslipstdc in next 3 dc, ch 3, slip st in next ch, skip next 2 ch, skip slip st 3 times; repeat from * to last 4 sts; dc in next 3 dc, dc in top of ch-3; turn.
Repeat
Continue repeating Row 2 for the pattern.
Rainbow Waves Throw Instructions
-
With Color A, ch 295.
-
Work Rows 1 and 2 in pattern stitch, changing to Color B in the last st of Row 2 – this makes 8 chevrons.
-
Then repeat Row 2 for pattern, working 2 rows each in the following color sequence:
B,C,D,E,F,G,H,I,J,K,AB, C, D, E, F, G, H, I, J, K, A – repeat this sequence 7 times. -
Fasten off and weave in all ends neatly.
Tips & Ideas
-
Choose classic rainbow shades for a bright and cheerful throw.
-
Try a pastel palette for a softer, modern look.
-
Use scrap yarns to create a unique rainbow effect with different textures.
-
This throw makes an excellent gift for birthdays, baby showers, or housewarmings.
The Rainbow Waves Throw Crochet Pattern is a fun, colorful project that brings happiness to every stitch. The combination of ripple waves and rainbow stripes makes it a timeless piece that you’ll enjoy making and using for years to come. Whether draped over your sofa or given as a handmade gift, it’s sure to brighten up any space.
So grab your favorite colors, follow this easy pattern, and start crocheting your very own Rainbow Waves Throw today! 🌈✨